Follow these steps to import an Eclipse project from your Github repository. These steps assume you have already followed the Java and Eclipse Setup and Configuring Eclipse guides.
There might be slight differences with the images below at the latest version of Eclipse, and the URLs may have changed to reflect the current term.
Configure Authentication Method
You will need to authenticate to Github within Eclipse to access your private repositories. There are two options based on the underlying protocol you want to use:
-
HTTP using a username and personal authentication token
-
SSH using ssh keys (and optionally a password)
Using your Github username and password authentication no longer an option for authentication via the command-line.
This only needs to be completed once. You will be able to use this same method of authentication for all your repositories in class.
Option 1: HTTP and Tokens
For this option, you need to generate a personal access token in Github. This guide from Github walks through the steps:
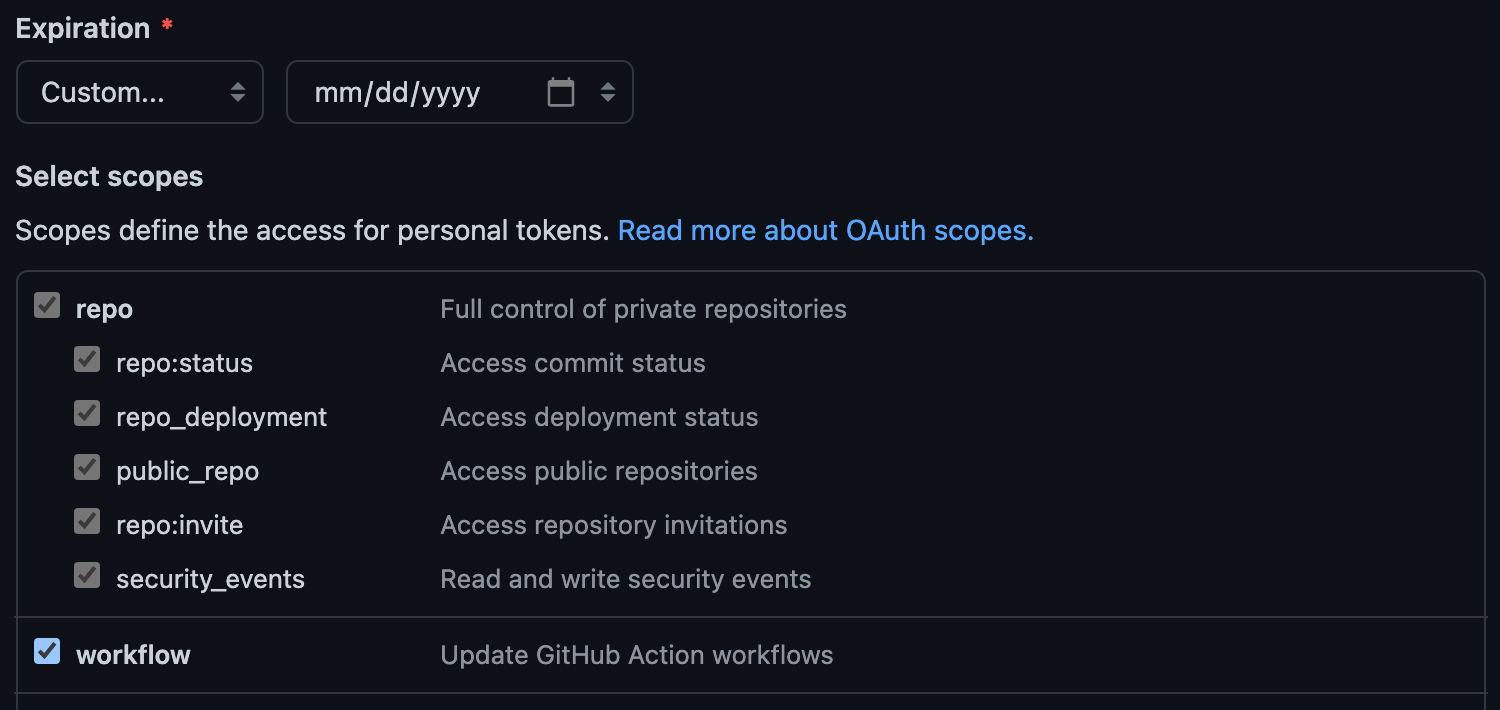
Choose a long enough expiration date to last the entire semester. You must select the repo option under the “Select scopes” section. You may also want to check workflow as well (optional).
Make sure to save this token somewhere safe (as safe as you store any password).
Whenever you are using the HTTPS link to clone your code and prompted for a password, enter this access token instead.
Option 2: SSH and SSH Keys
For this option, you need to generate SSH keys on your system (or use existing ones if you already have them). To set these up:
-
Follow the Github Generating a New SSH Key guide for your operating system to generate SSH keys for the first time. Before you start:
-
When prompted for a passphrase for your key, you can press Enter without entering anything to skip adding a passphrase. Either is fine. It is more secure to enter a passphrase, but less convenient. See the Working with SSH Key Passphrases guide from Github for more information.
-
Do NOT forget to complete the Add the SSH Key to Github step at the very end!
-
-
Follow the Github Testing Your SSH Connection guide from your computer to make sure everything is setup properly.
Sometimes, Eclipse does not know where your SSH keys are located. If you are running into issues, reach out to us. We will help you with the setup.
Import Project into Eclipse (New Repository)
Follow these steps if you do not yet have the Github repository on your system locally. This includes the first time you import the lecture code, homework assignments, and first time you import the project.
Log into Github, open Eclipse, and follow these steps:
-
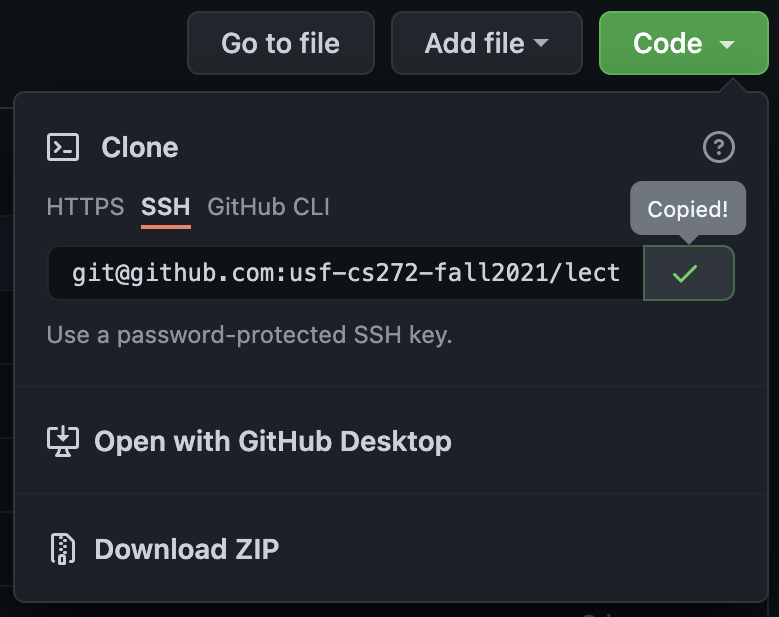
Copy the HTTPS or SSH link to clone your repository in Github (based on what you configured earlier):
-
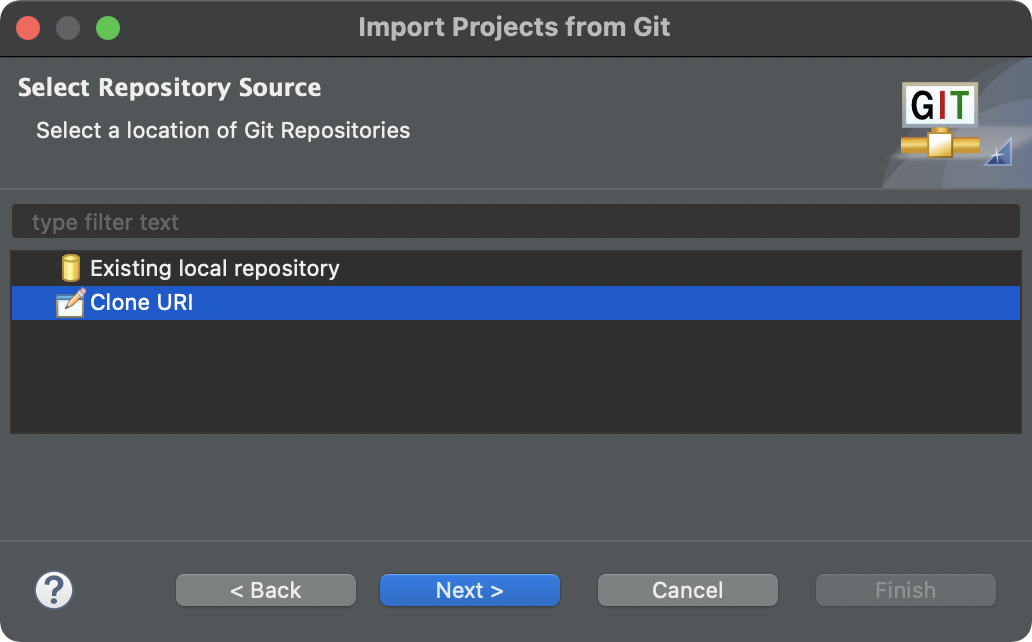
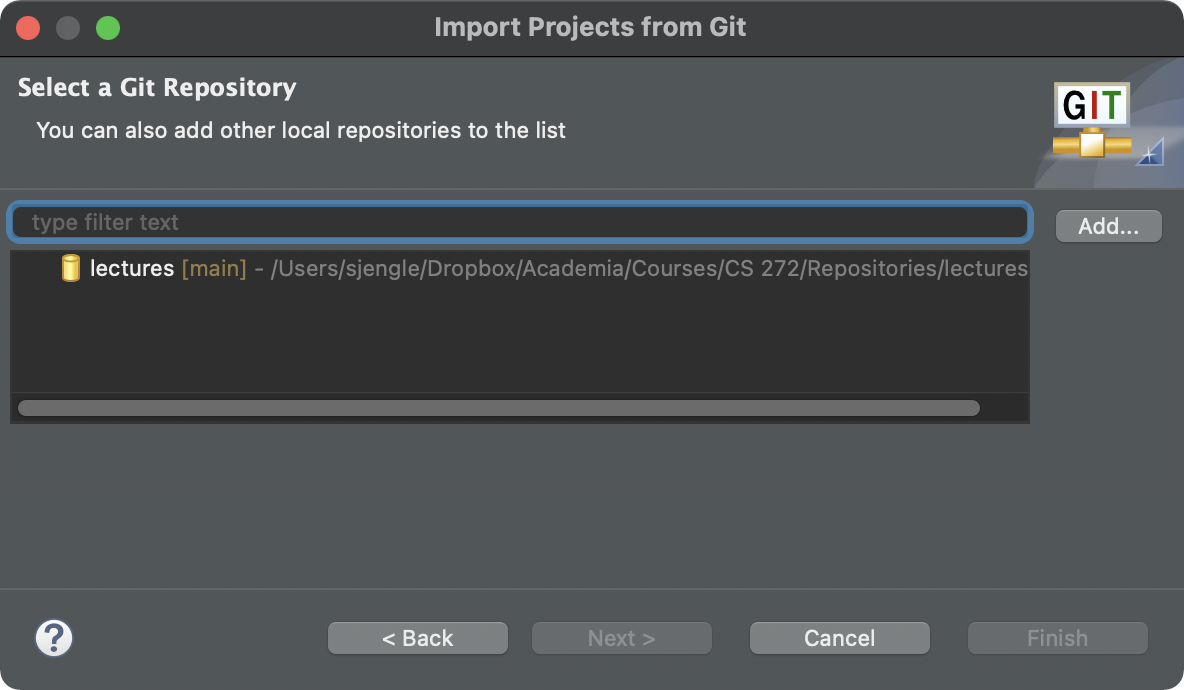
Switch to Eclipse and select “File” » “Import…” from the menu. This will bring up this dialog:

Open the “Git” node, select “Projects from Git”, and click the “Next” button.
-
On the next window, select “Clone URI” and click the “Next” button again.
-
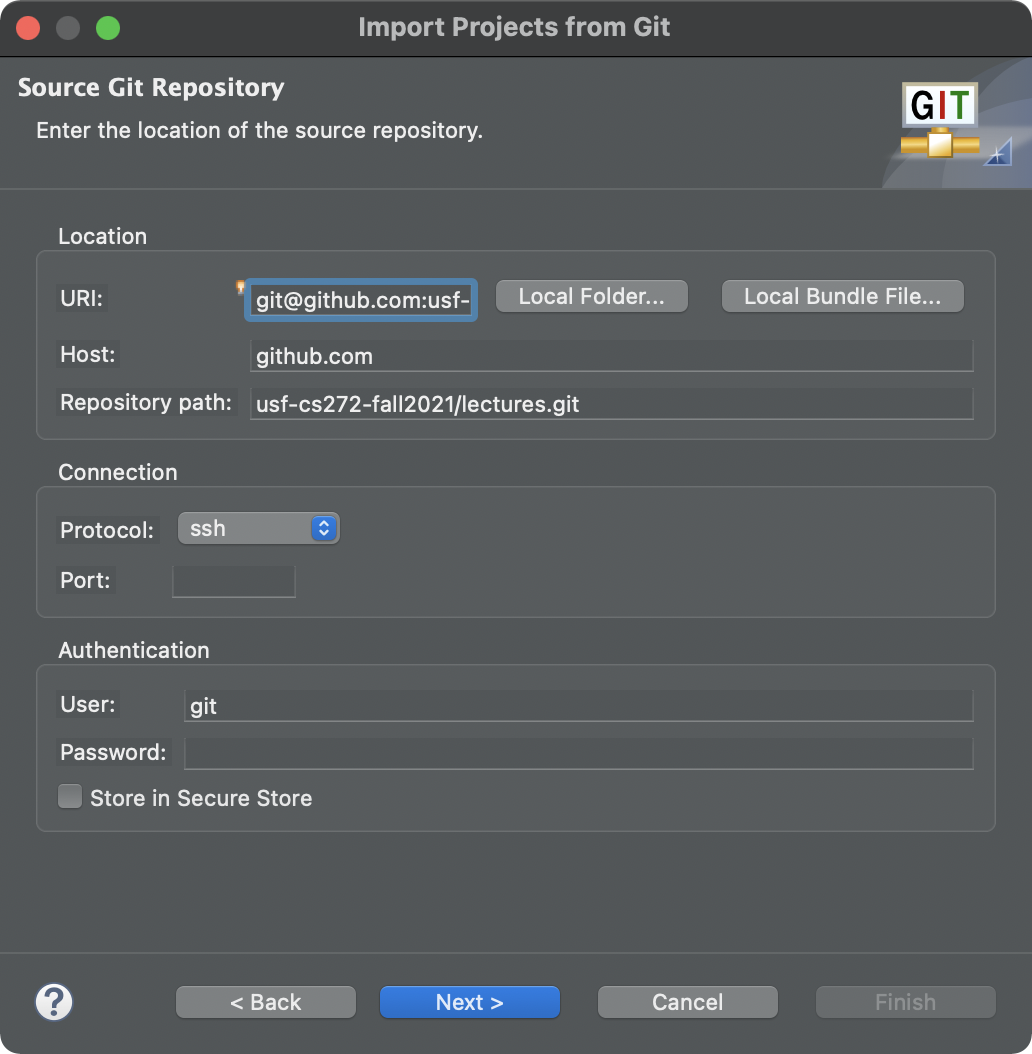
Paste the clone URI copied from Github in the “URI” field. The rest should automatically fill in. Click the “Next” button.
-
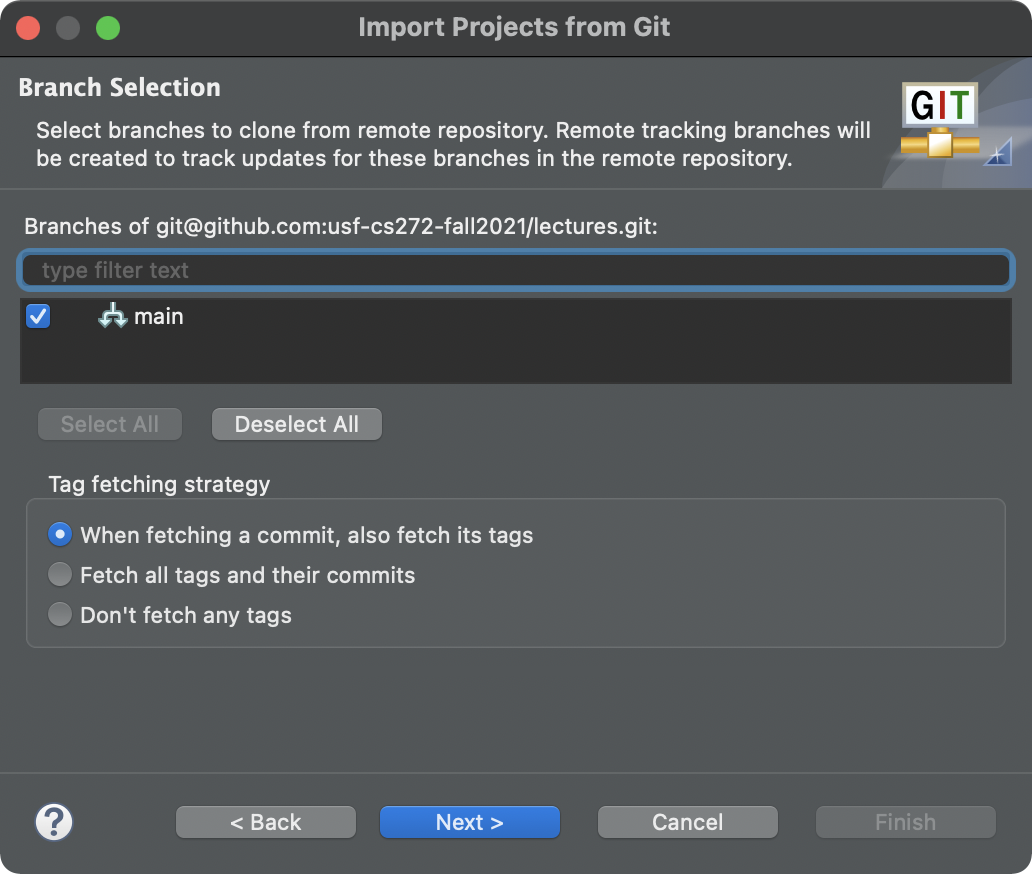
On the next “Branch Selection” screen, keep everything as-is and click the “Next” button again.
-
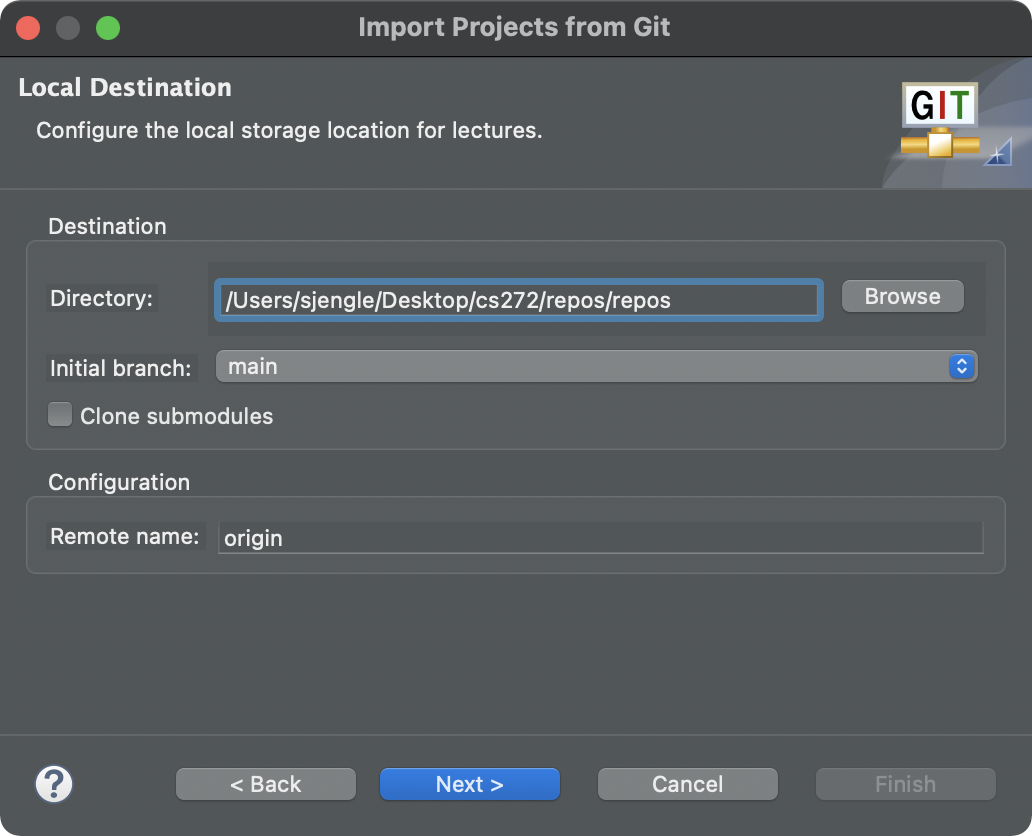
On the “Local Destination” screen, make sure the path listed for the “Directory” is NOT inside your Eclipse workspace folder. Click the “Next” button to continue.
-
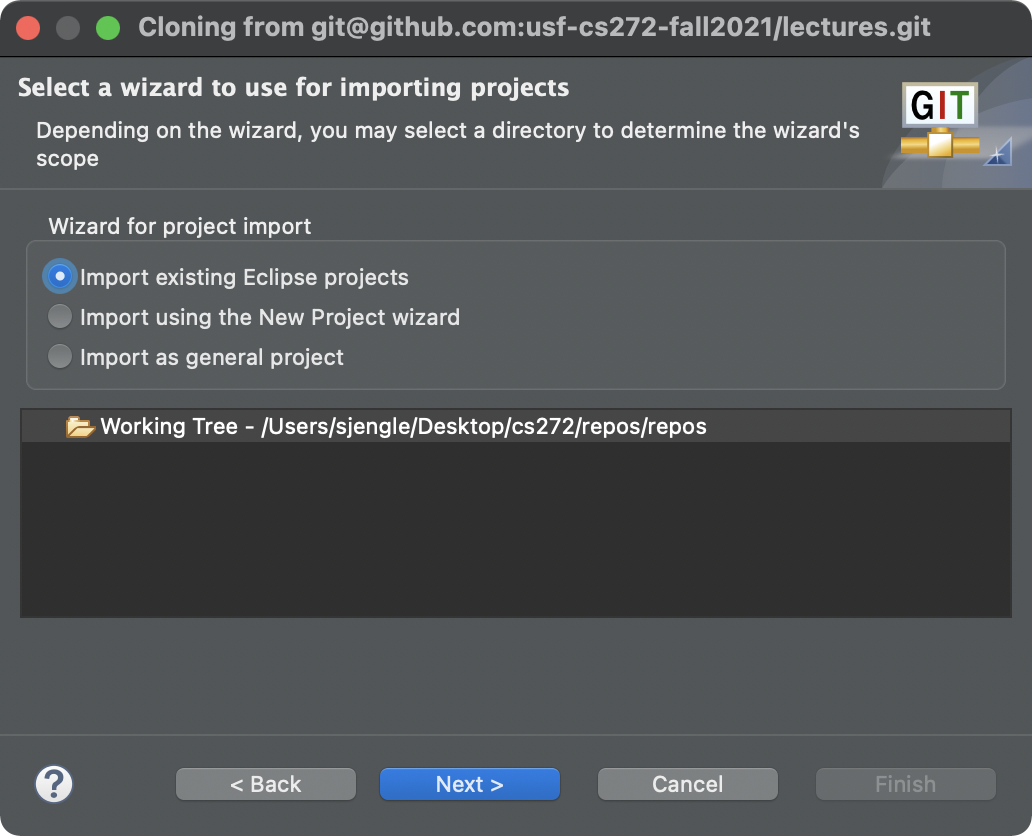
Select the “Import existing Eclipse projects” when prompted and click the “Next” button again.
-
Finally, select the project(s) you want to import. Click “Finish” to complete the import.
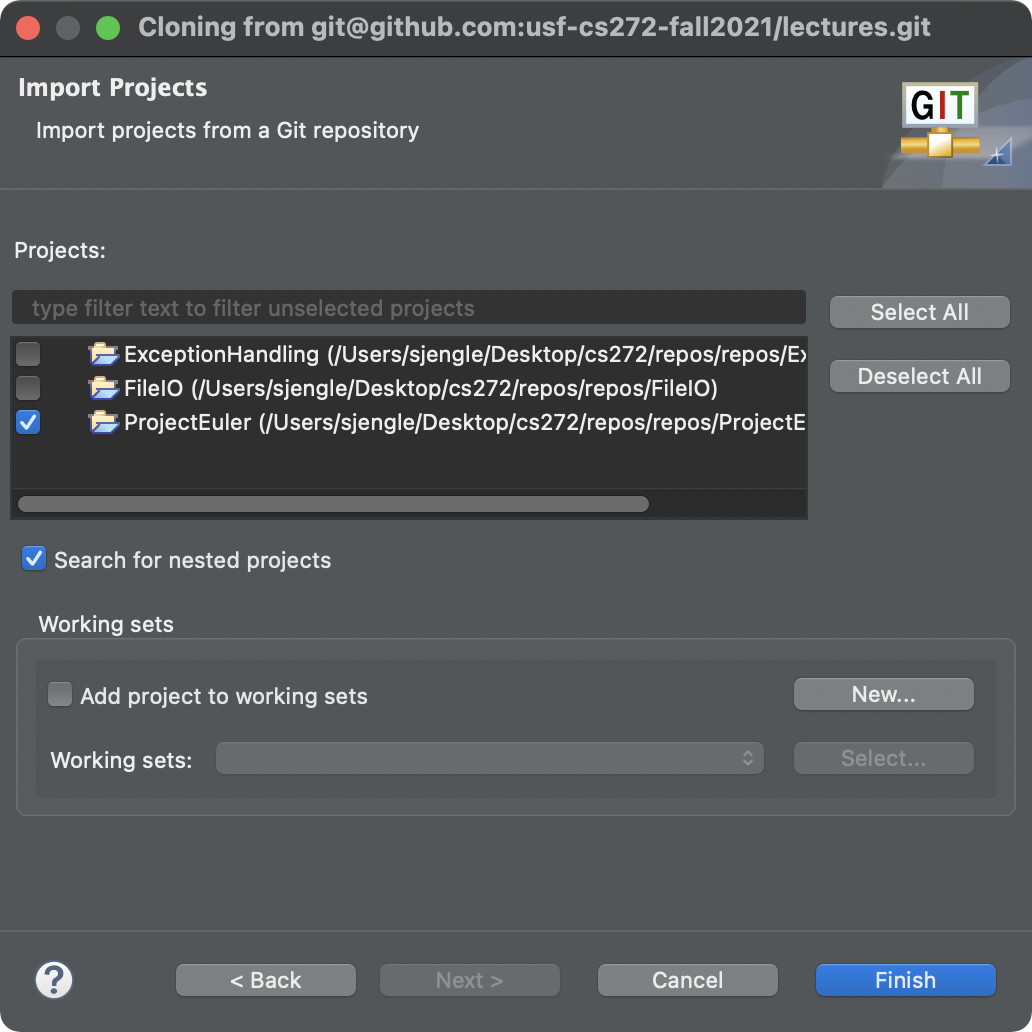
You only need to add this repository once, even if there are multiple Eclipse projects within that repository. For example, you only need to import the lectures repository once. However, since each homework assignment has its own repository, you will have to import each repository separately.
Import Project into Eclipse (Existing Repository)
If you already have the repository on your system locally, double-check that you have the latest version of the remote repository by performing a “Pull” action. You can do this in Eclipse (Help), via the command-line, or any other git tool.
Then, open the import dialog as before (step 2). Select “Existing local repository” in step 3 instead of “Clone URI” and click “Next”.
If the repository is already listed, make sure it is selected. Otherwise, click “Add” to add the repository and follow the prompts. Click “Next” to continue when done.
This will then skip to the wizard in step 7. Follow the prompts as before.
Troubleshooting
If you notice several errors, don’t panic! It takes some time for everything to update in Eclipse when you first import a new project. If you notice a progress bar in the lower-right corner, wait for it to finish first.

If the errors do not go away, try these steps first:
-
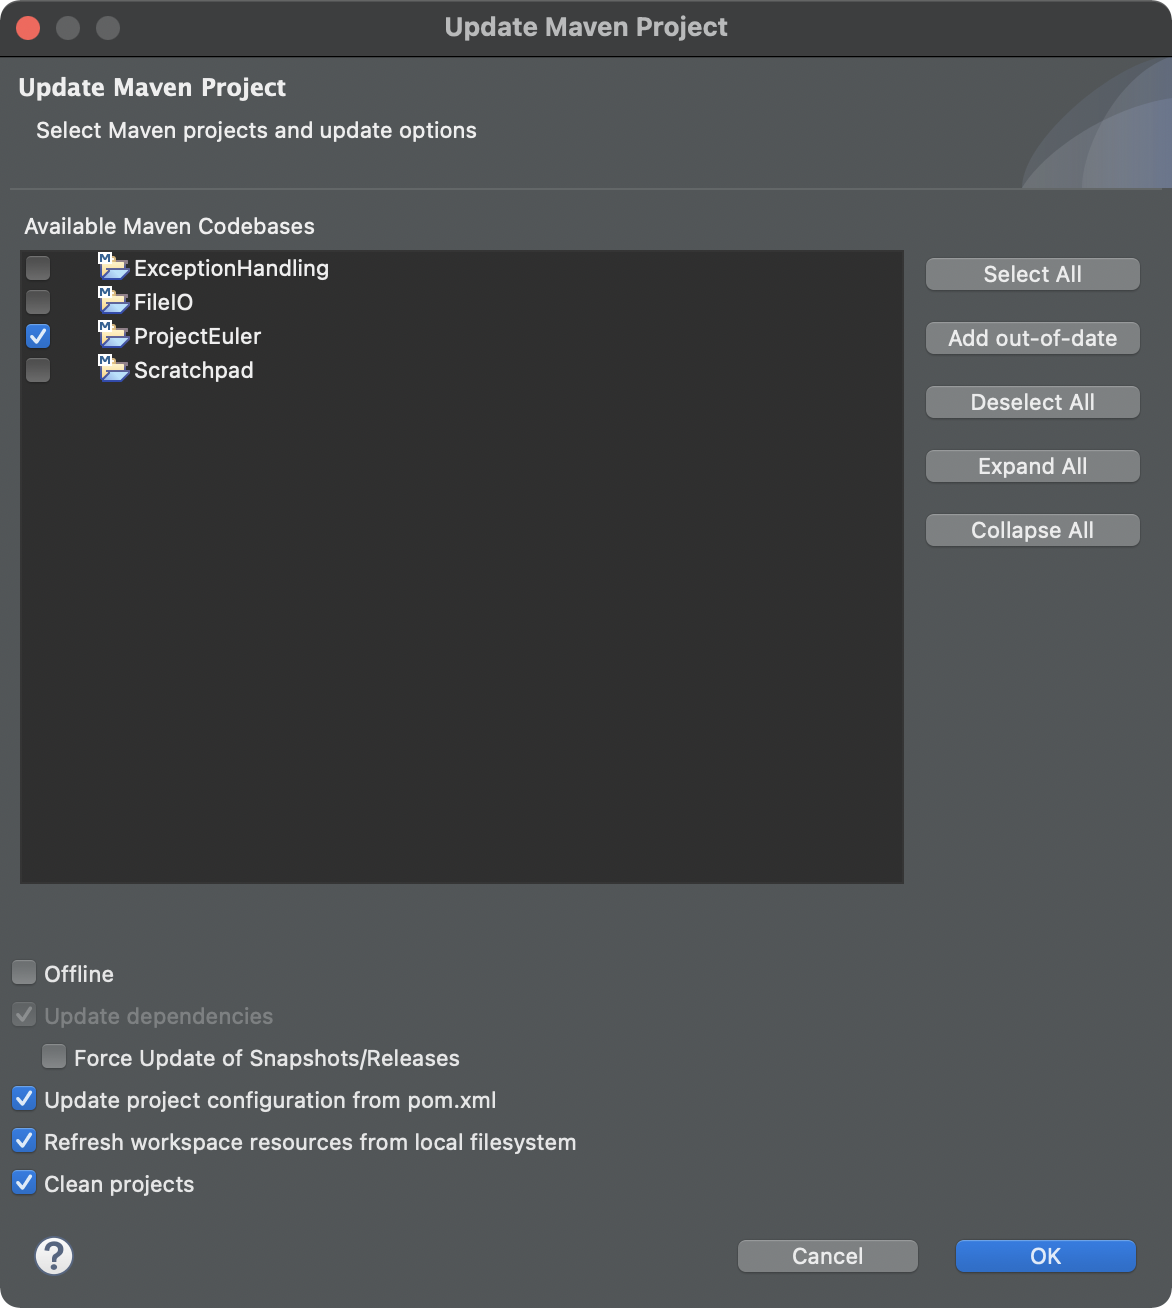
Update the maven project by right-clicking the project in the Package Explorer view, selecting “Maven” » “Update Project…” from the menu.
-
Clean up the project by going to “Project” » “Clean…” in the main menu.
If those steps do not fix it, it is likely something isn’t quite right with the build path setup for your Eclipse project. This often happens when your setup is different from expected (either you have a different version of Eclipse or Java).
To fix this, right-click your project folder and select “Build Path” and “Configure Build Path” from the menus. On the following window, click the “Libraries” tab. Remove everything that has a red “x” icon or is listed as “unbound” in the label.
Now, we have to re-add the necessary libraries. Click the “Add Library…” button and follow these steps:
-
Select “JRE System Library” to re-add Java 16 (if necessary). I recommend you select “Workspace default JRE” unless the default is NOT Java 16.
-
Select “JUnit” to re-add JUnit 5 (if necessary). Make sure “JUnit 5” is selected in the dropdown, not JUnit 4.
-
Select “User Library” to add a third-party user library (if necessary).This is now handled using the maven tool.
Click “Apply” and “OK” when done. You should see all of the scary red icons disappear. If not, ask on Piazza or during office hours for help!
If the Eclipse workspace becomes corrupted somehow, it is often easier to make sure your code is committed and pushed to Github, and then re-importing everything in a fresh workspace.